Harness the Sun: The Power and Potential of Solar Roofs

Harness the Sun: The Power and Potential of Solar Roofs

I. Introduction

A. The growing importance of renewable energy sources

In today’s rapidly evolving world, the importance of renewable energy sources cannot be overstated. As the planet grapples with the adverse effects of climate change, the transition towards renewable energy has become an imperative. These sources are not only unlimited but also have a lesser environmental impact compared to their traditional counterparts.

Renewable energy sources, such as solar power, play a vital role in reducing greenhouse gas emissions and mitigating climate change. Solar energy, in particular, stands out due to its immense potential. It is abundant, clean, and readily available. By harnessing the power of the sun, we can generate electricity without burning fossil fuels, leading to a significant reduction in carbon dioxide and other harmful gases released into the atmosphere.

B. The rise of solar energy and its benefits

Solar energy has experienced a remarkable rise in popularity due to its numerous benefits. Unlike fossil fuels, solar energy is a renewable resource that will never run out. The sun provides an endless supply of energy that can be harnessed for various applications, ranging from heating water to powering homes and businesses.

Solar energy also offers a viable solution to energy security issues. With solar power, we can reduce our dependence on fossil fuels, which are subject to price volatility and geopolitical tensions. By diversifying our energy sources and utilizing solar roofs, we can achieve a more stable and secure energy future.

C. The increasing popularity of solar roofs

Solar roofs, an innovative way to harness solar energy, are gaining popularity across the globe. These systems, integrated into the structure of a building, serve a dual purpose – providing shelter and generating electricity. Solar roofs have the potential to revolutionize the way we consume energy, making sustainable living more accessible and convenient.

By incorporating solar panels directly into the roofing material, solar roofs eliminate the need for separate installations. This integration not only enhances the aesthetic appeal of the building but also maximizes the efficiency of solar energy generation. With solar roofs, we can utilize the untapped space on our rooftops to generate clean and renewable energy.

II. Understanding Solar Roofs

A. Definition and concept of solar roofs

Solar roofs are a type of solar energy system that incorporates solar panels into the roofing material. Unlike traditional solar installations, solar roofs are designed to serve as the roof itself rather than being mounted on an existing roof. This integration of solar technology into the building structure represents a significant advancement in green architecture.

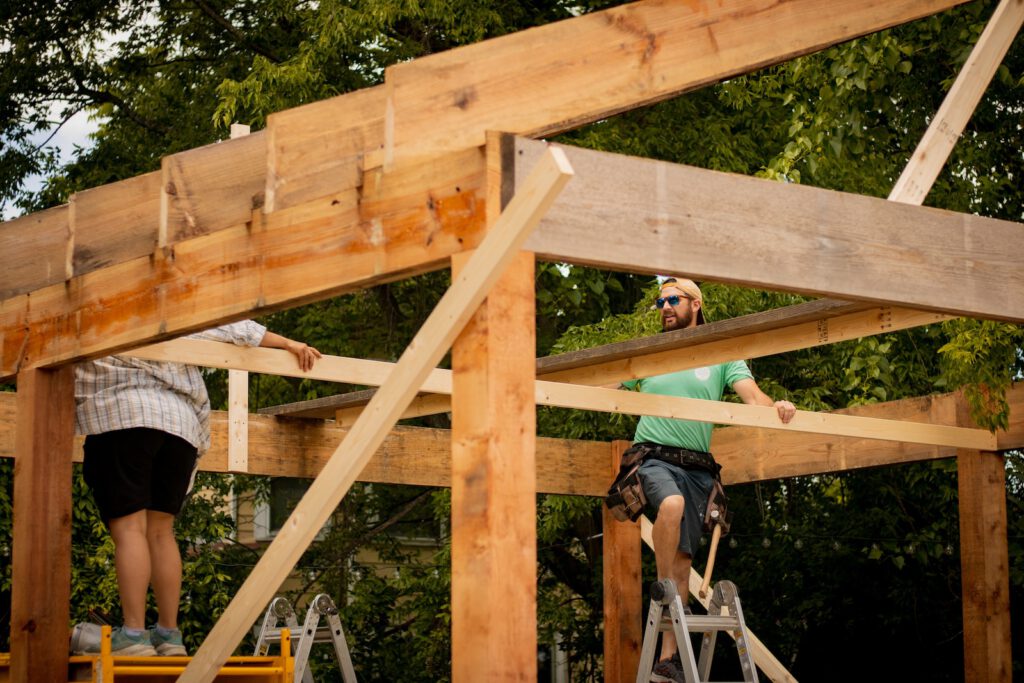
By seamlessly blending solar panels with the roof, solar roofs provide a sleek and cohesive appearance. They eliminate the need for bulky solar panel mounts and racks, resulting in a more aesthetically pleasing and streamlined design. Solar roofs are an excellent option for new constructions or roof replacements, where the solar panels can be seamlessly integrated during the building process.

B. How solar roofs work and generate electricity

Solar roofs work by absorbing sunlight and converting it into electricity. This process is facilitated by photovoltaic cells, which compose the solar panels. When sunlight hits these cells, it knocks electrons loose, creating an electric current. This direct current (DC) is then converted into alternating current (AC), which can be used to power homes and businesses.

The photovoltaic cells within the solar panels are made of semiconductor materials, such as silicon. These cells contain layers of negatively and positively charged materials, which create an electric field when exposed to sunlight. When photons from the sunlight strike the cells, they excite the electrons, causing them to move and generate an electric current.

To optimize energy generation, solar roofs are typically installed in areas with ample sunlight exposure. The orientation and tilt of the solar panels are carefully calculated to maximize the absorption of sunlight throughout the day. Additionally, advanced monitoring systems can track the energy production and ensure optimal performance of the solar roof system.

C. Different types of solar roof systems

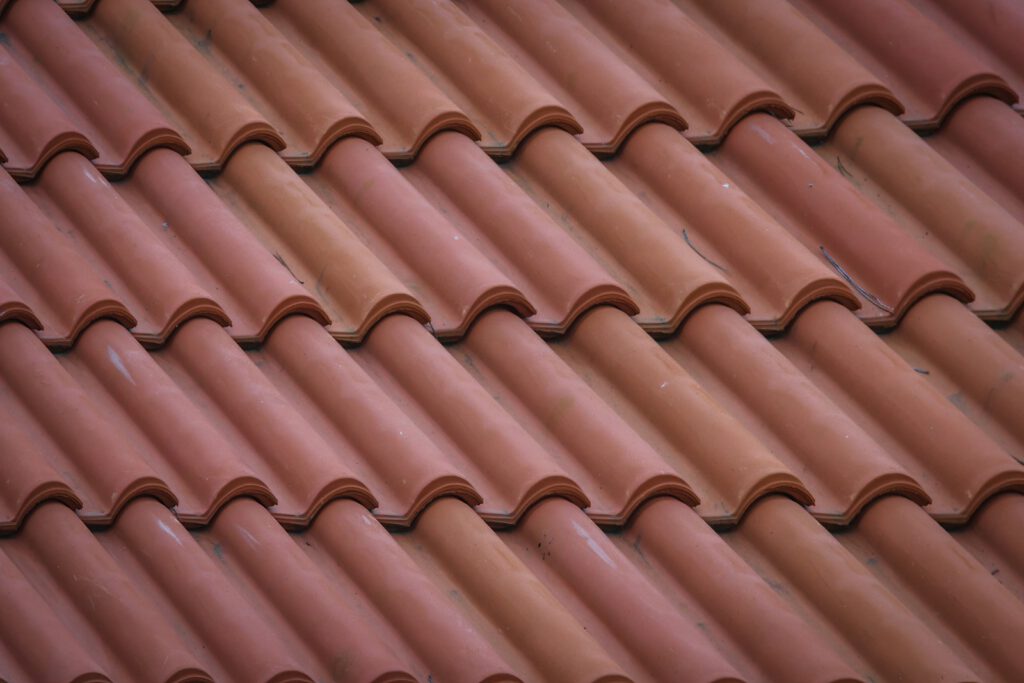
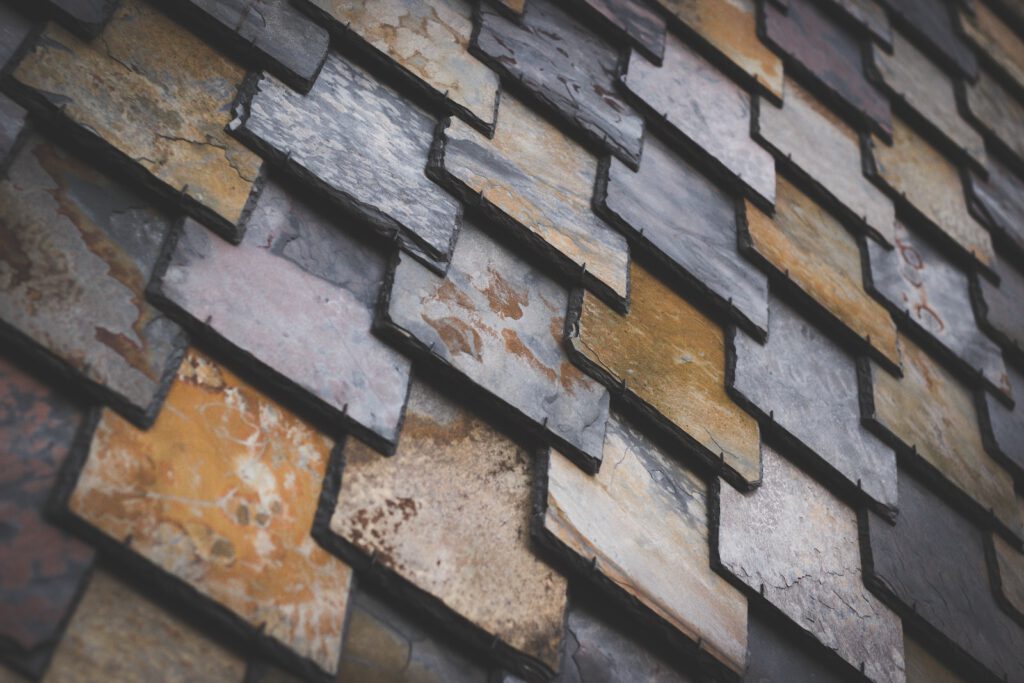
There are various types of solar roof systems available in the market. These include solar shingles, solar tiles, and building-integrated photovoltaics (BIPV). Solar shingles and tiles are designed to resemble traditional roofing materials, making them a popular choice for homeowners. BIPV, on the other hand, is a more comprehensive approach that integrates solar technology into the building’s structure.

Solar shingles and tiles are installed just like regular roofing materials, and each individual piece contains small solar cells. They seamlessly blend with the rest of the roof, providing an aesthetically appealing solution for those who prefer a more traditional look. These solar roof systems are durable, weather-resistant, and can generate electricity while still providing the primary function of protecting the building.

Building-integrated photovoltaics (BIPV) take solar roof systems to the next level by integrating solar technology directly into the building’s structure. BIPV can be used in windows, facades, and other parts of the building envelope, enabling a more comprehensive and efficient use of solar energy. This approach offers greater design flexibility and allows for the seamless incorporation of solar power into various architectural styles.

III. Advantages of Solar Roofs

A. Environmental benefits of solar roofs

1. Reduction in greenhouse gas emissions

Solar roofs help reduce greenhouse gas emissions by generating electricity without burning fossil fuels. This results in a significant decrease in carbon dioxide and other harmful gases released into the atmosphere, contributing to the fight against climate change.

By transitioning to solar energy, we can minimize our reliance on non-renewable energy sources, such as coal and natural gas. These conventional energy sources emit substantial amounts of greenhouse gases during their extraction, transportation, and combustion processes. Solar roofs offer a cleaner and more sustainable alternative, helping to mitigate the environmental impact of our energy consumption.

2. Conservation of natural resources

By harnessing the power of the sun, solar roofs allow us to conserve natural resources. They reduce our reliance on non-renewable energy sources, such as coal and natural gas, helping to preserve these resources for future generations.

Non-renewable energy sources are finite and will eventually deplete. By utilizing solar roofs, we can tap into the virtually limitless energy provided by the sun. This not only reduces the pressure on our dwindling fossil fuel reserves but also safeguards the environment by minimizing the need for resource extraction and the associated environmental degradation.

B. Financial benefits of solar roofs

1. Savings on electricity bills

One of the most significant financial benefits of solar roofs is savings on electricity bills. After the initial investment, the electricity generated by solar roofs is practically free, leading to substantial savings over time.

By generating their electricity, homeowners can reduce or even eliminate their reliance on the grid for power consumption. Solar roofs produce electricity during the day when the sun is shining, allowing homeowners to offset their energy usage and save on expensive utility bills. The cost savings can be even more significant in regions with high electricity rates or where net metering policies are in place.

2. Potential for earning through net metering or feed-in tariffs

In some regions, homeowners with solar roofs can sell the excess electricity produced by their system back to the grid under net metering or feed-in tariff schemes. This can be an additional source of income, offsetting the cost of the solar roof.

Net metering allows solar roof owners to receive credits for the excess electricity they generate and feed it back into the grid. These credits can then be used to offset future electricity bills, effectively reducing the overall cost of energy consumption. Feed-in tariffs, on the other hand, provide a fixed payment for each kilowatt-hour of electricity produced by the solar roof system, offering a direct financial incentive for solar energy generation.

C. Increased property value with solar roofs

Installing a solar roof can increase the value of a property. As more homebuyers become environmentally conscious, properties with solar roof systems are becoming increasingly desirable. Moreover, the promise of lower electricity bills can be a significant selling point.

Solar roofs not only provide long-term financial benefits to homeowners but also enhance the market value of their properties. Studies have shown that homes equipped with solar roofs tend to sell at a premium compared to similar properties without solar installations. Potential buyers are attracted to the prospect of reduced energy costs and the environmental sustainability associated with solar power.

Note: This is the revised blog article in markdown format.

Innovate and Sustain: Exploring Eco-friendly Roofing Options

Innovate and Sustain: Exploring Eco-friendly Roofing Options

I. Introduction

A. Importance of eco-friendly practices in roofing

In the current age of environmental awareness, incorporating eco-friendly practices in all aspects of our lives has become essential, and the roofing sector is no exception. The choices we make for our roofs have a significant impact on the environment, making it crucial to opt for sustainable and eco-friendly options. By choosing eco-friendly roofing practices, we can contribute to environmental preservation and create a better future for generations to come.

B. Brief overview of the article’s purpose and content

This article aims to provide valuable insights into the world of eco-friendly roofing. We will explore the concept of eco-friendly roofing, its benefits, various sustainable roofing materials, innovative technologies, and considerations to make while choosing these options. Additionally, we will showcase successful implementations of eco-friendly roofs to inspire individuals and businesses towards a sustainable future.

II. Understanding the concept of eco-friendly roofing

A. Definition and significance of eco-friendly roofing

Eco-friendly roofing involves the use of materials and technologies that minimize environmental impact and contribute to sustainability. By adopting eco-friendly roofing practices, we can reduce energy consumption, improve indoor air quality, and minimize waste in landfills. This approach plays a crucial role in green construction and promotes a healthier and more eco-conscious way of living.

B. Benefits of choosing eco-friendly roofing options

When it comes to roofing, choosing eco-friendly options provides numerous benefits. These options not only contribute to environmental preservation but also offer advantages such as energy efficiency, improved air quality, extended roof lifespan, and long-term cost savings. By integrating eco-friendly roofing materials and technologies, we can create sustainable and resilient structures that align with our commitment to a greener future. Some specific benefits include:

  1. Energy efficiency: Eco-friendly roofing materials, such as cool roofs, can reflect sunlight and reduce heat absorption, leading to lower cooling costs and decreased energy consumption.

  2. Improved air quality: Certain eco-friendly roofing materials, like green roofs, absorb carbon dioxide and release oxygen, contributing to cleaner and healthier air.

  3. Extended roof lifespan: Sustainable roofing options, such as metal roofs or recycled shingles, have a longer lifespan compared to traditional materials, reducing the need for frequent replacements and minimizing waste.

  4. Cost savings: Although eco-friendly roofing options may have a higher upfront cost, they often result in long-term savings through reduced energy bills, lower maintenance expenses, and potential tax incentives or rebates.

  5. Aesthetic appeal and increased market value: Eco-friendly roofing can enhance the visual appeal of buildings, adding a touch of natural beauty. Additionally, these sustainable features can increase the market value of properties, attracting environmentally conscious buyers.

C. Impact of traditional roofing methods on the environment

Traditional roofing methods often have detrimental effects on the environment. The use of non-sustainable materials and practices contributes to energy waste, landfill waste, and water pollution. Here are some specific impacts of traditional roofing methods:

  1. Energy waste through poor insulation: Traditional roofs with inadequate insulation can result in energy loss, as they allow heat to escape during colder months and enter during hotter months. This leads to increased energy consumption for heating and cooling purposes.

  2. Landfill waste due to frequent replacements: Conventional roofing materials, such as asphalt shingles, have a limited lifespan and often require replacement every 20-30 years. This results in a significant amount of waste being generated and sent to landfills.

  3. Water pollution from runoff: Traditional roofing materials, such as asphalt, can contribute to water pollution through runoff. Rainwater flowing over these roofs can pick up pollutants and chemicals, eventually contaminating water sources.

By transitioning to eco-friendly roofing options, we can mitigate these environmental impacts and create a more sustainable future.

[To be continued with the remaining headings and subheadings…]

Eco-Conscious Choices: The How-To of Sustainable Roof Installation

Eco-Conscious Choices: The How-To of Sustainable Roof Installation

In today’s world, sustainability is more than just a buzzword; it’s a necessity. The installation of a sustainable roof is a significant step towards achieving this goal. A sustainable roof can help decrease energy consumption, reduce waste, and promote a healthier environment.

Choosing to install a sustainable roof offers both homeowners and the environment a plethora of benefits. For homeowners, it can significantly reduce energy bills, improve indoor air quality, and increase property value. Meanwhile, it benefits the environment by reducing landfill waste, decreasing CO2 emissions, and promoting biodiversity.

II. Understanding Sustainable Roofing

Sustainable roofing refers to the use of environmentally friendly and energy-efficient roofing systems. The principles behind sustainable roofing go beyond just the materials used. It also considers the roof’s life cycle, energy efficiency, and the potential for reuse or recycling.

Several materials are commonly used in sustainable roofs, each with its unique benefits. These include metal, slate, and recycled shingles. Metal roofs, for example, are highly durable and reflective, reducing energy costs. Slate roofs, on the other hand, are made from natural materials and can last for up to a century.

When designing a sustainable roof, several factors need to be considered. These include the roof’s lifespan, its energy efficiency, the recyclability of its materials, and its adaptability to different weather conditions. It is important to choose materials and design features that minimize environmental impact and maximize energy efficiency.

III. Assessing Your Roofing Needs

Before installing a new roof, it’s crucial to evaluate the current condition of your existing one. This includes checking for any signs of damage, assessing its energy efficiency, and estimating its remaining lifespan. By understanding the current state of your roof, you can determine whether repairs or a complete replacement is necessary.

Different roofing materials have different lifespans and durability levels. For example, asphalt shingles typically last between 15 and 30 years, while metal roofs can last up to 70 years. Understanding these differences can help homeowners choose the best material for their needs. Consider factors such as longevity, maintenance requirements, and environmental impact when making your decision.

Energy efficiency is a key aspect of sustainable roofing. To identify your roof’s energy efficiency requirements, consider factors such as insulation, reflectivity, and ventilation. Proper insulation can help regulate temperature and reduce the need for excessive heating or cooling, ultimately saving energy and reducing utility bills. Reflective roofing materials can reflect sunlight and reduce heat absorption, contributing to a more energy-efficient home.

IV. Choosing Sustainable Roofing Materials

There are several eco-friendly roofing options available today, including metal, clay, and recycled materials. Metal roofs are durable, recyclable, and energy-efficient. They are also lightweight, reducing the need for additional structural support. Clay roofs are made from natural materials and are highly resistant to fire and water damage. Recycled roofing materials, such as shingles made from recycled plastic or rubber, help reduce landfill waste and promote sustainability.

When choosing a roofing material, it’s essential to compare both its environmental impact and longevity. Materials like metal and clay have low environmental impacts and long lifespans, making them excellent choices for sustainable roofing. Consider factors such as durability, maintenance requirements, and the ability to recycle or repurpose the materials after its lifespan.

Local climate and weather conditions play a significant role in choosing a sustainable roofing material. For instance, metal roofs are ideal for hot climates due to their reflectivity, which helps to reduce heat absorption and keep the interior cool. Clay roofs, on the other hand, are well-suited for areas with heavy rainfall due to their water resistance and ability to withstand moisture.

V. Planning the Installation Process

Finding a reputable and experienced roofing contractor is crucial for a successful sustainable roof installation. Look for contractors with experience in installing sustainable roofs and who are familiar with the best practices in the industry. They can provide guidance on material selection, installation techniques, and ongoing maintenance.

Before starting the installation process, make sure to obtain all necessary permits and comply with all local regulations. This may include building codes, zoning laws, and environmental regulations. It is important to ensure that the installation follows all legal requirements and meets safety standards.

The best time to install a new roof depends on several factors, including the weather, the contractor’s availability, and your personal schedule. Aim to schedule the installation during a time when the weather is predictable and your contractor is available. This will help minimize delays and ensure a smooth process.

VI. Implementing Sustainable Roofing Techniques

Proper insulation is key to the energy efficiency of your roof. It helps keep your home warm in the winter and cool in the summer, reducing your energy consumption and lowering your energy bills. Consider using eco-friendly insulation materials, such as recycled cellulose or natural fibers, to further enhance the sustainability of your roof.

Rainwater harvesting systems and green roofs are two sustainable roofing techniques that can help conserve water. Rainwater harvesting systems collect and store rainwater for later use, reducing the reliance on municipal water sources. Green roofs use plants to absorb rainwater, reducing runoff and promoting biodiversity. These techniques can contribute to water conservation and create a more sustainable ecosystem.

Solar panels and cool roof coatings are two other sustainable roofing techniques. Solar panels generate renewable energy from the sun, reducing reliance on fossil fuels and lowering carbon emissions. Cool roof coatings reflect sunlight, reducing heat absorption and lowering cooling costs. These techniques can help homeowners reduce their carbon footprint and contribute to a more sustainable energy system.

VII. Maintaining and Extending the Lifespan of Your Roof

Regular inspection and maintenance are crucial for extending the lifespan of your roof. This includes cleaning the roof, checking for damage, and making necessary repairs. By addressing issues promptly, you can prevent further damage and prolong the life of your roof.

Common roofing issues include leaks, damaged shingles, and moss growth. Addressing these issues promptly can prevent further damage and extend the lifespan of your roof. Regular cleaning and maintenance can help prevent the buildup of debris and the growth of moss or algae, ensuring optimal performance and durability.

To maximize the durability and sustainability of your roof, consider factors such as the quality of materials used, the installation process, and the roof’s maintenance. Choose high-quality materials that are designed to withstand environmental factors and have a long lifespan. Follow proper installation techniques to ensure structural integrity and minimize the risk of future issues.

VIII. Financing and Incentives for Sustainable Roofing

There are several financial assistance options and tax credits available for homeowners who install sustainable roofs. These can help offset the initial cost of installation and make sustainable roofing more affordable. Research available programs and incentives at the local, state, and national levels to take advantage of any available benefits.

Many local governments offer programs and incentives for green initiatives, including sustainable roofing. Research these options in your area to take advantage of any available benefits. These programs may include grants, rebates, or low-interest loans to encourage homeowners to choose sustainable roofing options.

While the initial cost of a sustainable roof may be higher than a conventional one, the long-term cost savings can be significant. These savings come from reduced energy bills, lower maintenance costs, and longer roof lifespans. By calculating the long-term cost savings, homeowners can make an informed decision about the financial benefits of sustainable roofing.

IX. Conclusion

Making eco-conscious choices in roof installation is more than just a trend; it’s a necessity. By choosing a sustainable roof, you can help conserve resources, reduce waste, and promote a healthier environment. Encouraging others to opt for sustainable roofing solutions is essential for creating a greener future. By sharing your experience and the benefits you’ve seen, you can help promote a more sustainable future. Creating a greener future requires a collective effort, and sustainable practices like installing a sustainable roof are important steps towards achieving this goal.

Roofing Mastery: Getting the Best out of Professional Tile Installation

Roofing Mastery: Getting the Best out of Professional Tile Installation

I. Introduction

A professionally installed tile roof not only ensures structural soundness and durability but also significantly enhances the aesthetic appeal of your property. In addition to withstanding harsh weather conditions, a well-installed tile roof provides excellent insulation, offering energy efficiency and cost savings in the long run.

II. Choosing the Right Tile Material for Your Roof

When it comes to tile materials, there are various options available in the market, each with its own unique characteristics and benefits. Understanding the different types of roof tiles will help you make an informed decision based on your preferences, budget, and the climate of your region.

  1. Durability and longevity: It is essential to choose a tile material that can withstand the elements and has a long lifespan. Clay tiles, for example, are known for their durability and ability to withstand hot and dry climates, while concrete tiles perform well in colder temperatures.

  2. Aesthetic appeal and architectural style: The chosen tile material should complement the architectural style of your home and enhance its overall appearance. With a wide range of colors, finishes, and shapes available, you can customize your tile roof to suit your preferences and create a visually appealing look.

  3. Climate suitability: Considering the climate of your region is crucial when selecting a tile material. Clay or slate tiles are recommended for hot and arid regions due to their heat resistance, while concrete tiles provide excellent insulation in colder climates. Metal tiles, on the other hand, are a versatile choice suitable for various climates, as they are resistant to both heat and cold.

III. Understanding the Tile Installation Process

Proper preparation and step-by-step installation are key to ensuring a successful tile roofing project. Familiarize yourself with the installation process to understand what to expect and ensure the best results.

A. Pre-installation preparations:

  1. Roof inspection and repairs: Before installing tiles, it is important to conduct a thorough roof inspection to identify any existing damages or weak spots that require repairs. This step ensures a solid foundation for the new roof.

  2. Ensuring proper underlayment and ventilation: Proper underlayment and ventilation play a crucial role in the longevity of your tile roof. Underlayment provides an additional layer of protection against water infiltration, while ventilation helps prevent heat buildup.

B. Step-by-step tile installation guide:

  1. Removal of existing roofing materials: If you are replacing an old roof, the first step is to carefully remove the existing roofing materials to avoid causing any structural damage.

  2. Installation of drip edge and other necessary components: Install the drip edge and other essential components to direct water away from the roof and prevent leaks.

  3. Laying the underlayment and starter course: Once the drip edge is in place, lay the underlayment and starter course. Underlayment provides an extra layer of protection, while the starter course ensures proper alignment of the tiles.

  4. Proper tile layout and alignment techniques: Correctly laying out and aligning the tiles is crucial for optimal performance. Misaligned tiles can lead to water leaks and reduce the roof’s lifespan.

  5. Securing tiles in place: After aligning the tiles, securely fasten them in place using appropriate fasteners. This step ensures that the tiles remain intact even under harsh weather conditions.

  6. Installation of ridge tiles and hip tiles: Ridge tiles are installed at the roof’s peaks, while hip tiles are installed at the corners. These tiles not only add to the aesthetic appeal but also enhance the roof’s durability.

  7. Finishing touches and necessary adjustments: Add the finishing touches, such as sealing the tiles and checking for any misaligned tiles. Ensure that all components are securely fastened to guarantee a well-installed tile roof.

C. Importance of hiring experienced and skilled professionals for tile installation:
Hiring experienced and skilled professionals for tile installation is crucial to ensure proper installation and prevent potential issues. They possess the necessary expertise and tools to deliver high-quality workmanship and can provide valuable advice on maintenance and care for your tile roof.

IV. Maintaining and Caring for Your Tile Roof

To maximize the lifespan of your tile roof, regular inspections and maintenance routines are essential. Follow these guidelines to keep your roof in top condition:

A. Regular inspections and maintenance routines:
Perform regular inspections to check for any signs of damage, such as cracked or broken tiles. Additionally, clean the gutters and ensure proper ventilation to prevent moisture buildup.

B. Cleaning methods and precautions:
When cleaning your tile roof, it is important to use appropriate methods and precautions. Avoid using high-pressure washers as they can damage the tiles. Instead, opt for a gentle cleaning solution and a soft brush to remove dirt and debris.

C. Identifying and addressing common tile roof issues:
Common issues with tile roofs include cracked or broken tiles, leaks, and moss or algae growth. It is crucial to promptly address these problems to prevent further damage. Replace damaged tiles, repair leaks, and remove any moss or algae growth using specially formulated cleaning solutions.

D. Professional maintenance services and their benefits:
Consider hiring professional maintenance services to ensure your tile roof’s optimal performance. These experts utilize specialized equipment and techniques to detect and rectify any issues. Furthermore, they can provide useful tips on maintaining your roof and prolonging its lifespan.

V. Enhancing the Performance and Longevity of Your Tile Roof

To further enhance the performance and longevity of your tile roof, consider the following:

A. Adding protective coatings and sealants:
Applying protective coatings and sealants can significantly enhance your tile roof’s performance. These coatings provide an additional layer of protection against weather elements, prevent color fading, and extend the lifespan of your roof.

B. Improving insulation and energy efficiency:
Enhancing your roof’s insulation can greatly improve energy efficiency. Consider installing insulating materials under the tiles or opting for tiles with built-in insulation. This helps regulate indoor temperature and reduces energy consumption.

C. Proper gutter maintenance and rainwater management:
Maintaining your gutters and effectively managing rainwater is crucial for the health of your tile roof. Ensure that gutters are clean and free from debris to prevent water accumulation, which can lead to roof and structural damage.

D. Dealing with moss, algae, and other organic growth:
Promptly address any moss, algae, or other organic growth on your tile roof. These growths can cause damage if left unchecked. Use specialized cleaning solutions to effectively remove them and prevent further issues.

VI. Conclusion

In conclusion, this article has provided a comprehensive guide to achieving roofing mastery through professional tile installation. By understanding the importance of professional installation, choosing the right tile material, following the correct installation process, and implementing proper maintenance and enhancement strategies, you can enjoy a beautiful and durable tile roof that will stand the test of time. Prioritize professional tile installation for your roofing needs to ensure a structurally sound, aesthetically pleasing, and long-lasting roof for your property.

Tile Perfection: The Assurance of Professional Installation

Tile Perfection: The Assurance of Professional Installation

Introduction

Professional tile installation is crucial in achieving a flawless and durable finish. It involves a combination of technical skill, aesthetic judgment, and experience that cannot be improvised. In this article, we will explore why professional installation is a must for any tile project, the common pitfalls of do-it-yourself (DIY) tile installation, and the benefits of hiring a professional tile installer.

Understanding the benefits of professional tile installation not only ensures a visually appealing result but also guarantees a long-lasting one. Let’s delve into the key aspects and their importance.

Understanding the Benefits of Professional Tile Installation

Consistency in Tile Placement

One of the key benefits of professional tile installation is consistent tile placement. Professionals have the expertise to avoid uneven or crooked tiles, ensuring that each tile is perfectly aligned. This meticulous attention to detail results in a seamless and uniform look that enhances the overall aesthetic of your space.

To achieve consistency in tile placement, professional installers follow precise guidelines and use specialized tools. They carefully measure and mark the layout, ensuring that the tiles are placed evenly and symmetrically. This ensures a visually pleasing result and minimizes the risk of tripping or uneven surfaces.

Additionally, professional installers have a keen eye for design and can suggest unique patterns or arrangements that can elevate the overall look of the space. They understand the importance of spacing and grout lines, creating a harmonious and balanced appearance.

Proper Surface Preparation

Surface preparation is a crucial part of tile installation. A professional installer ensures the substrate is clean and level before starting the installation process. This preparation is fundamental for the tiles to adhere properly, ensuring long-lasting durability.

Professional installers meticulously inspect the surface for any imperfections, such as cracks, bumps, or moisture issues. They take the necessary steps to address these issues, which may include repairing or leveling the substrate, applying moisture barriers, or using specialized primers. This thorough preparation creates a stable foundation for the tiles, preventing future problems such as cracked tiles or loose adhesion.

Furthermore, professional installers have access to advanced tools and equipment that aid in surface preparation. These tools, such as floor leveling systems and moisture meters, help them achieve optimal conditions for tile installation. They have the expertise to identify and resolve potential issues before they become major problems, ensuring a successful and long-lasting tile installation.

Expert Knowledge and Experience

Professional tile installers bring a wealth of knowledge and experience to the table. They can guide you in selecting the right type and size of tiles for your space and employ effective installation techniques to ensure the best outcome.

With their extensive experience, professional installers have encountered various challenges and have developed solutions to overcome them. They understand the characteristics of different types of tiles and their compatibility with specific environments. This knowledge allows them to recommend the most suitable tiles for your project, taking into consideration factors such as durability, slip resistance, and maintenance requirements.

Professional installers stay updated with the latest industry trends and advancements, ensuring that they are well-equipped to handle any tile installation project. They are familiar with the best practices and techniques for cutting, shaping, and installing tiles, ensuring a precise and professional result.

Additionally, professional installers have a deep understanding of the potential pitfalls and challenges that can arise during tile installation. They know how to avoid common mistakes and are well-prepared to handle unexpected issues. This expertise not only saves time and money but also ensures a superior end result.

Avoiding Common DIY Tile Installation Mistakes

Lack of Precision in Measurements

DIY tile installation often suffers from a lack of precision in measurements. This can affect the overall tile layout and make it difficult to achieve the desired patterns. Professionals, on the other hand, have the training and tools to ensure exact measurements.

Professional installers use precise measuring techniques, such as laser levels and layout grids, to ensure accurate and consistent tile placement. They take into account factors such as room dimensions, tile size, and desired patterns to create a layout that is visually pleasing and functional.

By avoiding measurement errors, professional installers can prevent issues such as uneven grout lines, tile misalignment, or the need for excessive tile cuts. This attention to detail results in a polished and professional finish that enhances the overall aesthetic of the space.

Inadequate Adhesive Application

An inadequate application of adhesive can lead to tiles shifting or coming loose over time. It also increases the risk of moisture damage. A professional installer knows how much adhesive to use and how to apply it correctly to prevent these issues.

Professional installers have a deep understanding of different types of adhesives and their suitability for various tile materials and substrates. They follow manufacturer guidelines and use the right techniques to ensure proper adhesive coverage and bond strength.

In addition to proper adhesive application, professional installers also consider factors such as curing time and temperature conditions. They create an optimal environment for adhesive curing, allowing it to develop its full strength and durability. This attention to detail ensures that the tiles remain securely in place, even in high-traffic areas or environments with moisture exposure.

Incorrect Grouting Techniques

Grouting is another area where DIY efforts often fall short. Incorrect techniques can result in uneven grout lines, gaps, and potential discoloration or cracking over time. Professional installers have the skill to apply grout correctly, ensuring a smooth and durable finish.

Professional installers understand the importance of proper grout selection and application. They consider factors such as tile spacing, joint width, and desired grout color to achieve the desired result. They use specialized tools and techniques to ensure consistent grout coverage and avoid common issues such as air pockets or excess grout residue.

Furthermore, professional installers are knowledgeable about different types of grout, such as epoxy or cement-based grout, and their suitability for specific applications. They understand the importance of proper curing and sealing to enhance grout durability and prevent staining or water penetration.

By entrusting the grouting process to a professional, you can be confident that the end result will be a seamless and visually pleasing finish that enhances the overall appearance of your tiled space.

The Professional Touch: Enhancing Aesthetics and Functionality

Creative Tile Design Possibilities

With a professional installer at the helm, you can explore creative tile design possibilities. They can create complex patterns and layouts, as well as incorporate decorative elements, to give your space a unique and personalized look.

Professional installers have a keen eye for design and can suggest innovative ideas that go beyond basic tile installation. They can create stunning focal points, accent walls, or intricate mosaic designs that add character and visual interest to your space. Their expertise in tile placement and pattern selection ensures that the design is visually balanced and harmonious.

Furthermore, professional installers have experience working with a wide range of tile materials, from ceramic and porcelain to natural stone and glass. They understand the unique properties and installation requirements of each material, allowing them to create captivating designs that showcase the beauty of the tiles.

Access to High-Quality Materials and Tools

Professional tile installers have access to a wide range of tile options and high-quality installation tools. This not only enhances the aesthetics of your project but also its durability and longevity.

Professional installers have established relationships with reputable tile suppliers, ensuring access to a diverse selection of tiles in various colors, sizes, and finishes. They can help you choose tiles that suit your design vision and meet your functional requirements.

Moreover, professional installers invest in high-quality installation tools and equipment that are specifically designed for tile installation. These tools ensure precise cuts, smooth edges, and efficient installation, resulting in a polished and professional finish.

By utilizing high-quality materials and tools, professional installers can create a tile installation that withstands the test of time, maintaining its beauty and functionality for years to come.

Expert Finishing Touches

From precise cutting and edge treatments to professional sealing for added protection, a professional installer ensures every detail is taken care of. These finishing touches make all the difference in achieving tile perfection.

Professional installers have the expertise to handle intricate cutting and shaping of tiles, ensuring that they fit seamlessly around corners, edges, or irregular surfaces. They use specialized tools, such as wet saws or tile nippers, to achieve precise cuts and smooth edges.

Additionally, professional installers understand the importance of proper sealing to protect the tiles from stains, moisture, and damage. They apply sealants that are specifically formulated for the type of tile and the intended application, ensuring long-lasting protection and easy maintenance.

By paying attention to these expert finishing touches, professional installers elevate the overall quality and longevity of your tile installation, creating a space that is both visually stunning and functionally reliable.

Hiring a Professional Tile Installer

When hiring a professional tile installer, it is important to do your research and ask for referrals. Take the time to evaluate their experience and credentials, and ensure you obtain a detailed cost estimate before making a decision.

Start by seeking recommendations from friends, family, or trusted professionals who have recently undergone tile installations. Look for installers who have a proven track record of delivering high-quality work and have positive reviews from satisfied customers.

Once you have a shortlist of potential installers, schedule consultations to discuss your project and assess their expertise. Ask for examples of their previous work and inquire about their certifications or training. A reputable installer should be able to provide references and showcase their portfolio to demonstrate their capabilities.

During the consultation, make sure to discuss your design vision, timeline, and budget. A professional installer should be able to provide you with valuable insights, suggestions, and a detailed cost estimate that includes labor, materials, and any additional services.

It is also essential to clarify the terms of the contract, including warranties, payment schedules, and any potential additional costs. A written contract protects both parties and ensures that all expectations are clearly defined.

Remember, hiring a professional tile installer is an investment in the long-term beauty and durability of your tile installation. By choosing a qualified and experienced professional, you can have peace of mind knowing that your project is in capable hands.

Conclusion

In conclusion, the advantages of professional tile installation are manifold. From achieving a flawless look to ensuring longevity, investing in professional services is a surefire way to achieve tile perfection. Professional installers bring expertise, precision, and creativity to the table, resulting in a visually stunning and durable tile installation that enhances the overall aesthetics and functionality of your space. So, when it comes to tile installation, trust the professionals to deliver the exceptional results you desire.

Experience Meets Expertise: Trusting Your Tile Roof to the Pros

Experience Meets Expertise: Trusting Your Tile Roof to the Pros

A well-maintained tile roof is not just an aesthetic asset, but a vital component that protects your home from the elements. It contributes significantly to your property’s overall value, energy efficiency, and comfort level. However, tile roof maintenance is not an easy task and requires a certain level of skill and experience. This brings us to the main topic of our discussion: the importance of entrusting your tile roof maintenance to professionals.

I. Introduction

A well-maintained tile roof is not only visually appealing but also essential for protecting your home from various weather conditions. It acts as a barrier against rain, wind, and even extreme temperatures, ensuring that your home remains comfortable and safe. However, maintaining a tile roof is no simple task. It requires expertise and experience to identify and address potential issues effectively. Therefore, it is crucial to rely on the knowledge and skill of tile roof professionals.

II. Understanding the Benefits of Hiring Tile Roof Experts

When it comes to tile roof maintenance, the benefits of hiring professionals are numerous. One of the significant advantages is their wealth of experience and knowledge. These experts have worked with various tile materials, allowing them to understand the intricacies of each type. They can identify signs of wear and tear that may not be apparent to an untrained eye. By addressing these issues promptly, they can prevent further damage and extend the lifespan of your roof.

Moreover, professional roofers have access to specialized tools and equipment specifically designed for tile roof maintenance. These tools enable them to perform tasks efficiently and effectively, ensuring that every aspect of your roof is thoroughly inspected and maintained. They can tackle complex tasks that may be challenging for homeowners to handle on their own, ultimately saving you time and effort.

To further enhance their expertise, these professionals undergo extensive training to stay up to date with the latest techniques and industry standards. They know how to perform maintenance tasks to the highest standard, ensuring that your tile roof remains in optimal condition for years to come.

III. Exploring the Expertise of Tile Roof Professionals

Tile roof professionals possess an in-depth understanding of different tile roof materials, which is essential for determining the most appropriate maintenance techniques. They can accurately assess the unique properties of each tile, allowing them to tailor their approach to suit the specific needs of your roof. This personalized approach ensures that your roof receives the care it requires, prolonging its lifespan and performance.

In addition to their knowledge of different tile materials, these experts utilize proper inspection techniques to identify potential issues. They know exactly where to look and what to look for, leaving no detail overlooked. This meticulous approach is crucial in preventing minor issues from escalating into major problems that can be costly to repair. By catching and addressing problems early on, tile roof professionals can save you from significant expenses and headaches down the line.

IV. The Value of Experience in Tile Roof Maintenance

Experience plays a significant role in the maintenance of tile roofs. Professionals with years of experience have encountered various roof issues and have developed efficient and effective solutions. They can draw from their past experiences, applying lessons learned to each new project. This allows them to address the root cause of roofing issues, rather than just providing temporary fixes.

An inexperienced person attempting to maintain a tile roof may overlook signs of damage or apply incorrect repair techniques. Such mistakes can lead to further damage and costly repairs. However, a seasoned professional will have encountered similar issues before and will know how to avoid these pitfalls. Their experience enables them to tackle problems with precision and accuracy, ensuring that your roof is repaired correctly the first time.

V. Building Trust with Tile Roof Professionals

When entrusting your tile roof to professionals, it is crucial to do thorough research. Start by looking for roofing companies with a solid reputation in the industry. Check their licenses, certifications, and insurance to ensure that they are legitimate and capable of delivering quality work. A reputable company will have the necessary credentials to back their expertise and reliability.

Reading customer reviews and testimonials can provide further insight into the quality of a company’s work and their customer service. Take the time to consider the experiences of previous clients and their satisfaction with the services provided. Additionally, it’s advisable to request references from the roofing company and reach out to these references to hear firsthand about their experiences. This step will give you confidence in your decision to entrust your tile roof maintenance to professionals.

VI. Conclusion

In conclusion, entrusting your tile roof maintenance to professionals is a wise decision. The combination of their expertise and experience ensures that your roof is in capable hands. By relying on their knowledge of different tile materials and their meticulous inspection techniques, you can rest assured that no issue will go unnoticed. Moreover, their valuable experience enables them to address roofing problems efficiently and effectively, preventing further damage and costly repairs. So, prioritize the longevity and durability of your tile roof by investing in professional maintenance. It’s an investment that will pay off in the long run, protecting your home and enhancing its overall value.

Every Tile in its Place: DIY Tile Roofing Done Right

Every Tile in its Place: DIY Tile Roofing Done Right

I. Introduction

A well-maintained roof is vital for the structural integrity of any building. It acts as the primary defense against harsh weather conditions and ensures the interior of your home remains dry and damage-free. Regularly maintaining your roof can extend its lifespan, prevent costly repairs, and enhance the overall aesthetic appeal of your home.

Taking on a DIY tile roofing project offers unique benefits. Apart from potential cost savings, it provides an opportunity to acquire new skills and a sense of accomplishment from completing a significant home improvement project. Furthermore, DIY tile roofing allows homeowners to have direct control over the quality of work and materials used.

In this article, we will delve into the intricacies of tile roofing, from understanding its different types to providing a step-by-step guide to a successful DIY tile roofing project. We’ll also explore common mistakes to avoid and offer tips to ensure a well-executed roofing job.

II. Understanding Tile Roofing

A. Different types of roof tiles

Roof tiles come in a diverse range of options, including clay tiles, concrete tiles, and slate tiles. Each type has its own unique characteristics and aesthetic appeal. Clay tiles, for instance, are renowned for their durability and resistance to fading. Concrete tiles, on the other hand, are praised for their versatility and affordability. Slate tiles offer a natural and elegant appearance.

B. Advantages and disadvantages of tile roofing

Tile roofing offers numerous advantages. Firstly, it is known for its long-term durability, making it a cost-effective option in the long run. The low maintenance requirements of tile roofing add to its appeal, as it saves homeowners both time and money. Additionally, tile roofs have superior fire resistance compared to other roofing materials, providing an extra layer of protection. Furthermore, tile roofing can significantly enhance the overall look of a home due to its distinctive aesthetic appeal.

However, it is important to consider the potential disadvantages of tile roofing. One of the main drawbacks is its higher cost compared to other roofing materials. Tile roofs may also require a stronger support structure due to their heavier weight. It is crucial to assess the structural capacity of your home before deciding on tile roofing.

C. Factors to consider before starting a DIY tile roofing project

Before embarking on a DIY tile roofing project, there are several factors to consider. Firstly, assess the structural capacity of your home to ensure it can support the weight of the tiles. Additionally, consider the local climate and its impact on the chosen material. Some tiles may be more suitable for specific climates, such as those with high wind or heavy rainfall. Lastly, think about the level of maintenance required to keep the roof in optimal condition. Some materials may require more frequent maintenance than others.

III. Preparing for DIY Tile Roofing

A. Assessing the roof condition and suitability for tile installation

The first step in any DIY tile roofing project is to assess the condition of your existing roof. Look for signs of damage, such as leaks or worn-out shingles. It is essential to ensure that the roof structure is strong enough to support the weight of the tiles. If there are any major issues or concerns, it may be necessary to consult a professional before proceeding with the installation.

B. Gathering necessary tools and materials

To successfully complete a DIY tile roofing project, gather all the necessary tools and materials before starting. This includes roofing tiles, underlayment, battens, nails, a hammer, a level, a ladder, and safety gear. Having everything prepared in advance will make the installation process smoother and more efficient.

C. Safety precautions and protective gear

Safety should always be a top priority when working on a roofing project. Before starting, make sure to wear appropriate protective gear, including gloves, safety goggles, and a hard hat. It is also crucial to ensure that the ladder is sturdy and secure to prevent falls or accidents. Lastly, avoid working in adverse weather conditions to minimize the risk of injuries or damage to the roof.

By following these guidelines and understanding the intricacies of tile roofing, you can confidently take on a DIY tile roofing project. Remember to pay attention to detail, follow proper installation techniques, and prioritize safety throughout the process. A well-executed tile roofing job can greatly improve the longevity, appearance, and value of your home.

Homeowner’s Guide: Installing Roof Tiles with Precision

Homeowner’s Guide: Installing Roof Tiles with Precision

Installing roof tiles with precision is more than just a matter of aesthetics; it’s a matter of safety and longevity. When roof tiles are properly installed, they can withstand the elements, protect your home from water damage, and serve you for decades. On the other hand, poor installation can lead to leaks, damage, and the need for costly repairs down the line.

The benefits of precision in roof tile installation are numerous. An accurately installed roof tile system can help maintain the structural integrity of your home, reduce the risk of leaks, and even improve energy efficiency. Moreover, it can enhance the overall appearance of your home, boosting its curb appeal and potentially its resale value.

I. Introduction

Installing roof tiles with precision is a complex task that requires attention to detail and careful execution. It is important to understand the different aspects involved in the process to ensure a successful installation. This guide will provide you with the necessary information and steps to install roof tiles with precision, ensuring the longevity and functionality of your roof.

II. Understanding Roof Tiles

Before you begin the installation process, it is crucial to have a good understanding of the different types of roof tiles available. Roof tiles come in a variety of materials, including clay, concrete, and slate, each with its own unique advantages and characteristics.

Clay tiles are known for their durability and resistance to corrosion. They are an excellent choice for homeowners looking for long-lasting roof tiles that can withstand harsh weather conditions. Concrete tiles, on the other hand, are cost-effective and come in a wide range of colors, making them a popular choice among homeowners. Slate tiles offer unparalleled durability and have a distinctive natural appearance, adding a touch of elegance to any home.

When choosing roof tiles, it is important to consider factors such as your home’s architectural style, the climate in your area, and the load-bearing capacity of your roof structure. These factors will help you make an informed decision and select the most suitable roof tiles for your specific needs.

III. Necessary Tools and Materials

To ensure a smooth and efficient installation process, it is essential to have all the necessary tools and materials on hand. Some of the tools required for roof tile installation include a roofing hammer, a tile cutter, a chalk line, and a trowel. These tools will help you accurately measure, cut, and install the roof tiles.

In addition to the tools, the materials used in the installation process are equally important. High-quality materials, such as roofing nails or screws, underlayment, flashing, and battens (if necessary), are essential for a roof that will last for years without frequent repairs. It is recommended to choose reliable suppliers and manufacturers to ensure the durability and performance of these materials.

IV. Step-by-Step Installation Process

A. Preparing the Roof

Before you can begin installing the roof tiles, proper preparation is crucial. The first step is to remove any old roofing materials, especially if they are damaged or worn out. This will provide a clean and stable surface for the new roof tiles.

Once the old materials are removed, it is important to inspect the roof for any damages or repairs needed. A solid and sturdy roof structure is essential for a successful tile installation. Any necessary repairs should be completed before proceeding with the installation process. Finally, the roof surface should be thoroughly cleaned to ensure that the underlayment and tiles adhere properly.

B. Laying the Underlayment

The underlayment is a vital component of the roof tile system as it serves as a secondary barrier against water and wind. It is typically made of felt or synthetic materials. When laying the underlayment, it is important to start at the bottom of the roof and work your way up, ensuring that each layer overlaps the one below it. This overlapping technique helps prevent water infiltration and ensures a watertight seal.

It is crucial to choose a high-quality underlayment product that is suitable for your specific roof type and climate conditions. The underlayment should be laid down evenly and securely to provide a stable base for the roof tiles and enhance the overall performance of the roof.

C. Installing the Roof Tiles

There are several methods for installing roof tiles, and the best one for you depends on the type of tiles you’re using and your specific roof structure. Whether you’re using interlocking tiles, overlapping tiles, or individual tiles, it is crucial to follow the manufacturer’s instructions and ensure each tile is aligned and spaced correctly.

When installing the roof tiles, it is important to pay attention to detail and ensure that each tile is securely fastened. This will prevent wind uplift and ensure the overall structural integrity of your roof. Proper installation techniques, such as using the appropriate fasteners and aligning the tiles correctly, will contribute to the longevity and functionality of the roof.

D. Securing the Roof Tiles

The final step in the installation process is securing the roof tiles. The type of fasteners you use depends on the type of tiles and the specific requirements of your roof. It is crucial to follow the manufacturer’s recommendations and use the appropriate fasteners to ensure a secure attachment.

Properly securing each tile is essential to prevent damage caused by wind or other external factors. The fasteners should be installed at the designated locations and tightened appropriately. Regular inspections and maintenance should be carried out to ensure that the fasteners remain in good condition and provide the necessary support for the roof tiles.

V. Finishing Touches and Maintenance

After the roof tiles are installed, it is important to add the finishing touches to enhance both the appearance and protection of your roof. Ridge caps and other finishing elements can be applied to provide a seamless and aesthetically pleasing finish. These elements not only improve the overall look of the roof but also help protect it from the elements, such as wind and rain.

Regular maintenance is crucial to ensure the longevity and functionality of your roof tiles. This includes inspecting the roof for any signs of damage or wear, cleaning the surface to remove debris and prevent clogging of the drainage system, and addressing any issues promptly. By staying proactive with maintenance, you can prolong the lifespan of your roof tiles and ensure that your roof continues to perform at its best.

VI. Conclusion

Installing roof tiles with precision is a complex task that requires careful planning, attention to detail, and the use of high-quality materials. A well-installed roof can protect your home, increase its value, and serve you for years to come. However, if you’re not confident in your ability to tackle this project, it’s always best to seek professional help. A professional roofer has the experience and knowledge to ensure your roof tiles are installed correctly and safely. By following the steps outlined in this guide and seeking expert assistance when needed, you can achieve a successful roof tile installation that will provide long-lasting protection for your home.

Crafting with Clay and Concrete: A DIY Guide to Tile Roofing

Crafting with Clay and Concrete: A DIY Guide to Tile Roofing

I. Introduction

A sturdy, well-maintained roof is a crucial element of every home. It shields you from the elements, contributes to the energy efficiency of your home, and increases your property’s overall value. The right roofing material plays a significant role in these benefits. This article will delve into the advantages of using clay and concrete tiles for roofing. These materials are not only durable but also aesthetically appealing, offering a variety of designs and styles to choose from. Moreover, we will provide a comprehensive DIY guide to tile roofing, equipping you with the necessary knowledge to embark on your roofing project.

When it comes to roofing materials, clay and concrete tiles are two popular options to consider. Both materials offer unique advantages and challenges that homeowners should carefully consider before making a decision. Clay tiles are known for their durability and ability to withstand harsh weather conditions. They are made from natural clay and fired at high temperatures, which gives them exceptional strength. Concrete tiles, on the other hand, are more affordable and easier to install compared to clay tiles. They are made from a mixture of cement, sand, and water, and are available in various colors and styles.

II. Understanding Clay and Concrete Tiles

Clay and concrete tiles, while similar in appearance, possess different characteristics. Clay tiles are generally more durable and can withstand harsh weather conditions compared to concrete tiles. They have a longer lifespan and are resistant to fading, cracking, and color changes. Additionally, clay tiles offer excellent insulation properties, helping to keep your home cool in the summer and warm in the winter. However, they can be more expensive than concrete tiles and require professional installation due to their weight.

On the other hand, concrete tiles are more affordable and easier to install. They are available in a wide range of colors and styles, allowing homeowners to achieve their desired aesthetic. Concrete tiles are also resistant to fire, insects, and rot, making them a low-maintenance option. However, they are not as durable as clay tiles and may require more frequent repairs or replacements. It’s important to consider your specific needs and budget when choosing between clay and concrete tiles for your roofing project.

III. Tools and Materials Needed

Before starting your tile roofing project, it’s essential to gather all the necessary tools and materials. Having the right tools will ensure a smooth and efficient installation process. Some of the tools you will need include roofing nailers, tile cutters, ladder hooks, and a chalk line. These tools will help you measure, cut, and secure the tiles properly.

In addition to the tools, you will also need to choose the type of clay or concrete tiles that best suit your needs. There are various options available, including different colors, shapes, and designs. Consider the architectural style of your home and your personal preferences when selecting the tiles.

Furthermore, you will need additional materials such as underlayment and fasteners for the installation process. Underlayment acts as a moisture barrier and provides added insulation. Make sure to choose an underlayment that is compatible with your chosen tiles and weather conditions. Fasteners, such as screws or nails, are used to secure the tiles to the roof deck. It’s important to select the appropriate fasteners based on the type of tiles you are using and the roofing substrate.

IV. Preparing the Roof

Before installing the tiles, it’s crucial to assess the existing roof structure and address any necessary repairs or replacements. Start by inspecting the roof deck for any signs of damage or wear that may affect the installation. Look for loose or damaged boards, rot, or leaks. It’s important to fix these issues before proceeding with the tile installation to ensure a solid foundation.

Once the roof deck is in good condition, the next step is to prepare the roof surface for tile installation. This involves cleaning the surface to remove any dirt, debris, or old roofing materials. A clean surface will ensure proper adhesion of the underlayment and tiles. After cleaning, install the underlayment, which acts as a barrier against water penetration. Make sure to follow the manufacturer’s instructions for proper installation techniques.

V. Installing Clay and Concrete Tiles

This section provides a step-by-step guide to tile installation, ensuring that you have a clear understanding of the process.

  1. Start by measuring and marking the roof for accurate tile placement. This will help you create a layout plan and ensure that the tiles are aligned properly.
  2. Apply the underlayment according to the manufacturer’s instructions. This typically involves rolling out the underlayment and securing it to the roof deck.
  3. Install the waterproofing membrane on top of the underlayment to provide an extra layer of protection against water infiltration.
  4. Create a tile layout plan, taking into consideration the size and shape of the tiles. This will help you determine the best placement and ensure a visually pleasing result.
  5. Begin installing the first row of tiles, starting from the bottom edge of the roof. Use roofing nails or screws to secure the tiles in place, following the manufacturer’s recommendations for spacing and fastener placement.
  6. Continue installing subsequent rows of tiles, making sure to properly align and secure each tile. Use a chalk line to maintain straight rows and a level to ensure even placement.
  7. Cut tiles to fit around vents, chimneys, and other obstacles using a tile cutter or wet saw. Take accurate measurements and make precise cuts to achieve a seamless look.
  8. Install ridge tiles and hip tiles to complete the roof’s edges and give it a finished appearance. Secure these tiles with mortar or adhesive, following the manufacturer’s instructions.
  9. Throughout the installation process, ensure proper tile alignment and spacing to maintain a consistent pattern. Double-check your work regularly to catch any mistakes or misalignments.

VI. Roofing Safety Precautions

Safety should always be a top priority when working on any DIY project, including tile roofing. Here are some essential safety precautions to keep in mind:

  • Wear safety glasses, gloves, and appropriate footwear to protect yourself from potential hazards.
  • Use caution when climbing ladders and ensure that they are properly secured before ascending.
  • Avoid working on the roof during extreme weather conditions, such as high winds or heavy rain.
  • Stay hydrated and take regular breaks to prevent exhaustion or heat-related illnesses.
  • Use proper lifting techniques when handling heavy tiles or equipment to avoid strain or injury.
  • If necessary, use a safety harness or fall protection system to prevent falls from the roof.

By following these safety precautions, you can minimize the risk of accidents and injuries while working on your tile roofing project.

VII. Maintaining and Repairing Tile Roofs

Proper maintenance is essential for keeping your tile roof in optimal condition and extending its lifespan. Regular maintenance practices include:

  • Cleaning the tiles regularly to remove dirt, moss, or debris that can accumulate over time. Use a soft brush or low-pressure water spray to avoid damaging the tiles.
  • Inspecting the roof annually for any signs of damage, such as cracked or broken tiles, loose fasteners, or leaks. Address these issues promptly to prevent further damage.
  • Replacing broken or damaged tiles as soon as possible. This will help maintain the integrity of the roof and prevent water infiltration.
  • Applying a protective coating or sealant to the tiles every few years to enhance their durability and resistance to fading or color changes.
  • Consulting with a professional roofer for more extensive repairs or maintenance tasks, such as resealing the entire roof or fixing structural issues.

By following these maintenance guidelines, you can ensure that your tile roof remains in top condition and continues to provide the benefits it offers.

VIII. Conclusion

In conclusion, this DIY guide provides a thorough understanding of tile roofing, from the benefits of clay and concrete tiles to the tools needed and the installation process. With this knowledge, you’re equipped to take on your own tile roofing project. Remember, while the task may seem daunting, the result is a durable, aesthetically pleasing roof that can significantly enhance your home’s value and appeal. Happy crafting with clay and concrete tiles!

Roofing Refined: Professional Tips for Tile Installation

Roofing Refined: Professional Tips for Tile Installation

I. Introduction

Proper tile installation plays a critical role in ensuring the durability and longevity of a roof. In addition to enhancing the aesthetic appeal of a building, a well-installed tile roof safeguards the interior from harsh weather conditions. This article provides a comprehensive overview of tile roofing, from understanding the different types of tiles and their advantages to step-by-step installation guidelines.

Tile roofing is a popular choice among homeowners due to its versatility and durability. Commonly used tile materials include clay, concrete, and slate, each offering distinct advantages in terms of longevity, maintenance, and aesthetic appeal. Clay tiles are known for their classic and timeless appearance, while concrete tiles provide a more affordable option without compromising on durability. Slate tiles, on the other hand, offer a natural and elegant look that can elevate the overall aesthetics of a building.

When considering tile materials, it is essential to take into account various factors such as the structural strength of the building, the local climate, and budget constraints. Clay tiles, for example, are ideal for regions with hot and dry climates, as they are highly resistant to heat and UV radiation. Concrete tiles, on the other hand, are more suitable for areas prone to heavy rains and strong winds due to their superior waterproofing capabilities. Slate tiles are commonly chosen for their exceptional durability and ability to withstand extreme weather conditions.

II. Understanding Tile Roofing

Tile roofing is not only aesthetically pleasing but also highly durable and long-lasting. One of the key advantages of tile roofing is its resistance to fire, rot, and insect damage. Unlike other roofing materials, tiles do not easily catch fire, providing an added layer of safety to the building. Furthermore, tiles are not prone to rot or decay, which can be a common issue with organic roofing materials such as wood. Additionally, insects and pests are less likely to cause damage to tile roofs, making them an ideal choice for homeowners concerned about the longevity of their roofs.

In terms of maintenance, tile roofing requires minimal effort. The tiles themselves are highly resistant to weathering, fading, and discoloration, reducing the need for frequent repairs or replacements. However, it is important to note that occasional inspections and maintenance are still necessary to ensure the roof remains in optimal condition. Regular cleaning to remove debris and dirt buildup can help prevent any potential issues and maintain the overall appearance of the roof.

III. Preparing for Tile Installation

Before commencing tile installation, it is essential to thoroughly assess the roof structure and its condition. This step is crucial in identifying any potential issues that might hinder the installation process and affect the overall performance of the roof. It is recommended to consult a professional roofing contractor or engineer to assess the structural integrity of the building and determine if any repairs or reinforcements are necessary.

In addition to assessing the roof structure, gathering the necessary tools and equipment is vital for a smooth installation process. Some of the essential tools for tile installation include a ladder, safety harness, roofing nailer, chalk line, measuring tape, and a rubber mallet. It is important to prioritize safety during the installation process by wearing appropriate protective gear, such as gloves and safety glasses, and following safety guidelines to prevent accidents and injuries.

IV. Step-by-Step Tile Installation Guide

The process of tile installation involves several essential steps to ensure a secure and long-lasting roof. Following a step-by-step guide can help streamline the installation process and minimize the risk of errors or damage.

  1. Clearing the old roofing materials and debris: Before installing new tiles, it is crucial to remove any existing roofing materials, such as shingles or old tiles, and thoroughly clean the roof surface. This ensures a clean and stable base for the new tiles.

  2. Applying underlayment for waterproofing: An underlayment, typically made of asphalt-saturated felt or synthetic materials, is installed over the roof deck to provide an additional layer of waterproofing. This helps protect the roof structure from water infiltration and potential damage.

  3. Securing the tiles in the correct pattern and alignment: Each type of tile has a specific installation pattern and alignment requirement. It is important to carefully follow the manufacturer’s instructions to ensure the tiles are laid out correctly and securely. This includes using appropriate fasteners, such as nails or screws, to secure the tiles in place.

  4. Installing flashings and other necessary components: Flashings, including ridge flashings, valley flashings, and sidewall flashings, are installed to provide additional waterproofing and prevent water penetration at vulnerable areas of the roof. Other necessary components, such as hip and ridge tiles, ventilation systems, and gutter systems, should also be installed as per the manufacturer’s guidelines.

  5. Properly fastening and securing the tiles: To ensure the longevity of the roof, it is crucial to properly fasten and secure the tiles. This includes using the recommended number of fasteners and ensuring they are driven in at the correct depth. Overdriven or underdriven fasteners can compromise the integrity of the roof and lead to potential issues in the future.

V. Common Mistakes to Avoid

Incorrect installation techniques can result in significant damage and costly repairs. To avoid potential issues and ensure the longevity of the tile roof, it is important to be aware of common mistakes and take necessary precautions.

  1. Inadequate ventilation and insulation: Proper ventilation and insulation are essential for maintaining a healthy and efficient roofing system. Inadequate ventilation can lead to moisture buildup, which can cause mold growth and compromise the structural integrity of the roof. Insufficient insulation can result in heat loss, leading to higher energy consumption and discomfort inside the building.

  2. Neglecting drainage issues: Proper drainage is crucial to prevent water pooling on the roof’s surface. Water pooling can lead to structural damage, including roof leaks and deterioration. Regular inspection and maintenance of gutters, downspouts, and other drainage components are essential to ensure effective water management.

  3. Lack of regular maintenance and inspection: Regular maintenance and inspection are vital to detect and address any issues early on. This includes checking for cracked or damaged tiles, loose fasteners, and signs of wear or aging. Prompt repairs and maintenance can prevent small problems from escalating into more significant issues and extend the lifespan of the tile roof.

VI. Tips for Extending the Lifespan of a Tile Roof

Proper cleaning and maintenance can significantly extend the lifespan of a tile roof. Here are some tips to help homeowners maximize the longevity of their tile roofs:

  1. Regular cleaning: Remove debris, such as leaves and branches, from the roof surface regularly to prevent clogging of gutters and potential water damage. Use a soft-bristle brush or a leaf blower for gentle cleaning, avoiding excessive pressure that may damage the tiles.

  2. Inspections and repairs: Schedule regular inspections by a professional roofing contractor to identify any potential issues, such as cracked tiles, loose flashings, or damaged underlayment. Prompt repairs and maintenance can prevent further damage and extend the lifespan of the roof.

  3. Moss and algae prevention: Keep the roof free from moss, algae, and other organic growth by using appropriate treatments or cleaning solutions. These organisms can retain moisture and cause damage to the tiles over time.

  4. Avoid walking on the roof: Minimize foot traffic on the roof to prevent accidental damage to the tiles. If necessary, use walkways or crawl boards specifically designed for tile roofs to distribute weight evenly and reduce the risk of cracking or breakage.

  5. Professional maintenance: Consider hiring a professional roofing contractor for periodic maintenance, especially for more complex tasks such as resealing or reapplying coatings. Professionals have the expertise and equipment to perform thorough inspections and ensure the roof remains in optimal condition.

VII. Conclusion

In conclusion, proper tile installation is critical for a durable and long-lasting roof. By understanding the different types of tiles and their advantages, homeowners can make informed decisions when choosing the most suitable material for their roofs. Additionally, following the step-by-step installation guidelines and avoiding common mistakes can ensure a successful tile roofing project. With regular maintenance and inspections, homeowners can extend the lifespan of their tile roofs, enjoying both the aesthetic appeal and the protection they provide.