 Roof insulation batts are a popular choice among Australians for their homes due to their effectiveness in maintaining optimal indoor temperatures, reducing energy costs, and promoting environmental sustainability. This article will guide you through a detailed, step-by-step process of installing roof insulation batts in your Australian home, covering topics from choosing the right insulation to maintenance and safety concerns.
Understanding Roof Insulation Batts
Before delving into the installation process, let’s understand what roof insulation batts are and their benefits. Batts are pre-cut sections of insulation that can be made from various materials, including fiberglass, polyester, or wool. They are designed to fit between the joists in your roof and work by trapping pockets of air, creating a thermal barrier that prevents heat transfer, and helps maintain an ideal indoor temperature.
Insulation batts not only help to keep your home warm in winter and cool in summer but also contribute to reducing your energy costs. They can also provide soundproofing benefits and contribute to a more sustainable environment by reducing your reliance on heating and cooling systems.
Choosing the Right Insulation
There are several factors to consider when choosing the right insulation for your home. The choice can vary based on your geographical location, type of construction, and personal preferences. Australia has various climate zones, and accordingly, the Building Code of Australia recommends different insulation R-values (a measure of thermal resistance) for each zone.
Ensure you choose the insulation batts that meet the recommended R-values for your climate zone. Also, consider factors such as the product’s life cycle, environmental impact, fire resistance, and soundproofing capabilities. It’s best to consult with a professional to ensure you’re making the right choice.
Tools and Materials Required
Before you begin the installation process, gather all the necessary tools and materials. You’ll need:
- Insulation batts
- Utility knife
- Tape measure
- Stapler
- Safety gear including gloves, dust mask, and safety goggles
- Ladder
- Portable light (if the attic doesn’t have enough lighting)
- Installation Process
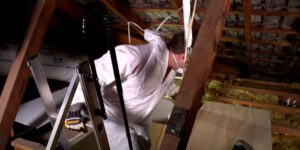
Step 1: Preparation
Before beginning, ensure the roof space is dry and clean. Any dampness or leaks could compromise the insulation’s effectiveness. Also, remove any old insulation if it’s damaged or ineffective. Ensure that you’re wearing appropriate safety gear to protect against dust and fiberglass particles.
Step 2: Measuring the Space
 Measure the distance between the joists and the depth of the space you’re insulating to determine how many batts you’ll need. The batts should fit snugly between the joists. If the batts are too small, they won’t insulate effectively, and if they’re too big, they could be compressed and lose their insulating properties.
Step 3: Cutting the Batts
Using a sharp utility knife, cut the batts to fit the space. It’s better to cut them a bit larger than your measurements to ensure a snug fit. Never compress the batts, as this can reduce their effectiveness.
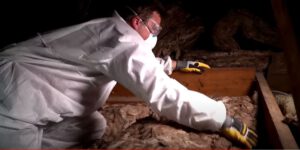
Step 4: Placing the Batts
Start at the far end of the attic and work your way towards the entrance. This way, you won’t need to walk over the batts you’ve already installed. Carefully place the batts between the joists without leaving any gaps. Make sure the batts aren’t blocking any soffit vents to maintain proper attic ventilation.
Step 5: Insulating Around Obstacles
For areas around obstacles such as pipes or electrical boxes, cut smaller pieces of insulation batts and fit them around the obstacles. Ensure not to cover any light fixtures or other heat-generating objects that could potentially cause a fire.
After Installation Care
Once the installation is complete, regularly check your insulation for any signs of damage or dampness. If you find any wet insulation, it’s important to identify the source of moisture and rectify it before replacing the batts.
Safety Concerns
Safety is paramount when installing insulation batts. Always wear protective clothing, including a dust mask, goggles, and gloves, to protect yourself from insulation fibers. Be cautious of any electrical wiring, and never cover any heat-emitting devices as it could pose a fire hazard. If you’re not comfortable with the installation process, it’s advisable to hire a professional to ensure safe and efficient installation.
Conclusion
Installing roof insulation batts in your Australian home can greatly improve your comfort and reduce your energy costs. While the process might seem intimidating, with the right tools, materials, and a detailed guide, it is certainly manageable. Remember, it’s important to prioritize safety throughout the process and ensure the insulation is properly maintained post-installation for optimum effectiveness.